
Making your own sunglasses case is more than just a fun craft project—it’s a practical way to protect your eyewear and express your personal style. But here’s the kicker… you don’t need to be an expert to get great results. In this article, you’ll find a detailed, beginner-friendly guide to making a stylish and durable sunglasses case from scratch. Whether you’re doing it for personal use, gifting, or even small-scale production, this guide has you covered from start to finish.
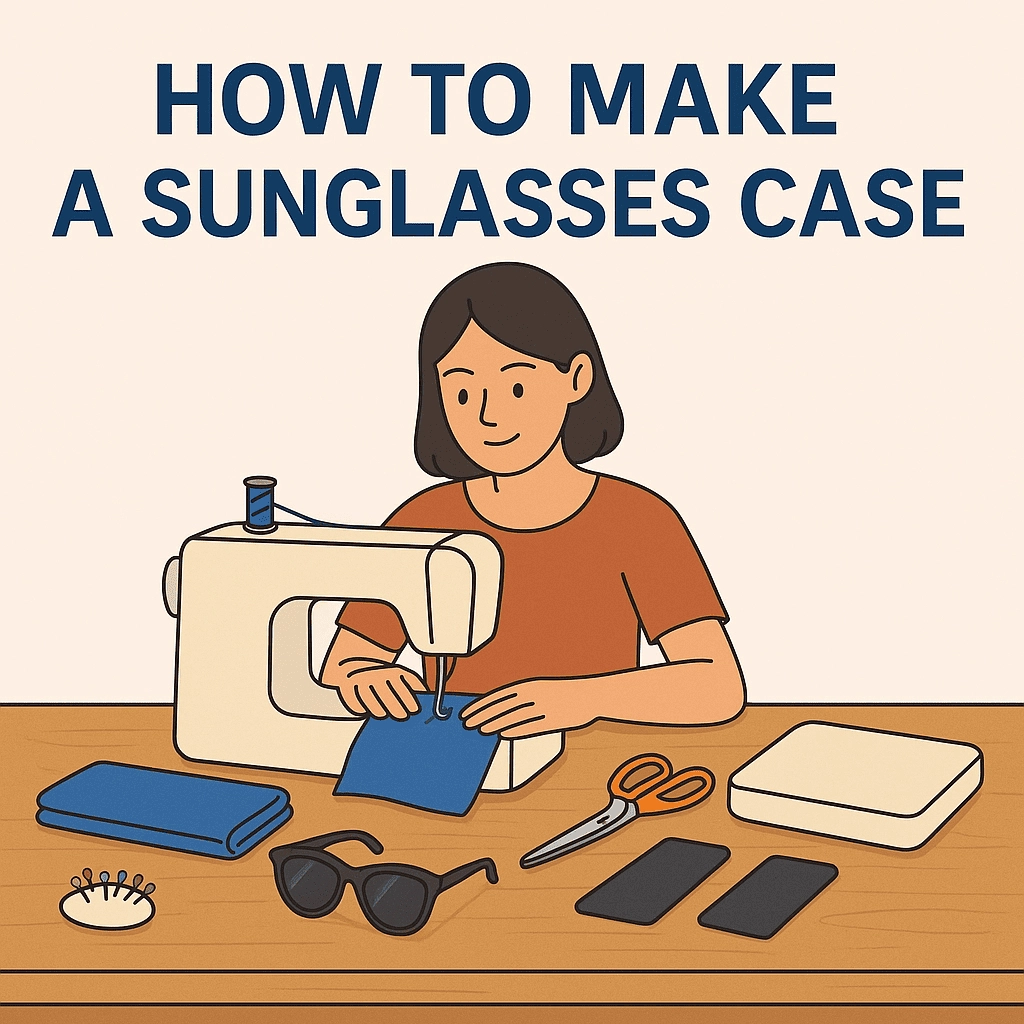
1. What materials do you need to make a sunglasses case?
Before you start cutting or stitching, you’ll need the right materials on hand. Let’s break it down. The fabric you choose sets the tone—cotton is a popular choice for its ease of use, but felt, denim, or even faux leather offer added texture and strength. For extra protection, consider adding interfacing or padding between your outer and inner layers. These can include quilt batting or foam for cushioning.
Your essential tools include a pair of sharp scissors or a rotary cutter, measuring tape or a ruler, sewing pins or clips, and a sewing machine or needle and thread. You’ll also want an iron to flatten your fabric, which helps during the sewing process. Depending on your closure style, you may need Velcro, a button, a snap, or a zipper.
For added flair, embellishments like ribbons, beads, or patches can personalize the case. Think of these extras as your creative playground.
Here’s a quick list:
| Item | Purpose | Notes |
|---|---|---|
| Cotton/Felt/Denim | Main fabric | Durable and easy to work with |
| Lining (microfiber) | Inner protection | Prevents lens scratches |
| Padding/Batting | Shock absorption | Optional but useful |
Ready for the good part? Once your supplies are sorted, you can move to the next stage: picking the fabric that fits your style and usage.
2. How do you choose the right fabric for your case?
Selecting the right fabric makes a huge difference in both durability and aesthetics. What’s the real story? The best material depends on your goals. Cotton is beginner-friendly, widely available, and comes in a variety of prints. However, it’s not always the most protective option unless paired with padding. Felt is thicker, holds its shape better, and doesn’t fray—ideal for no-sew cases or simple stitched versions.
Leather or faux leather gives a high-end finish and excellent protection but is harder to work with, especially for beginners. Denim offers a nice balance of toughness and visual texture.
It’s also worth thinking about your eyewear type. For heavier or designer sunglasses, thicker materials like felt or leather may be more appropriate. For lightweight glasses, cotton or microfiber may suffice.
Let’s not forget design. Fabrics with bold prints can make your case pop, while neutral colors give a timeless look. Use contrasting fabric for the lining to add a professional touch.
| Fabric Type | Benefits | Considerations |
|---|---|---|
| Cotton | Easy to sew, colorful | Needs reinforcement |
| Felt | Thick, no fray | Can attract lint |
| Faux Leather | High-end feel, durable | Requires special needles |
This is where it gets interesting… The right material is not just about looks—it directly affects the case’s functionality.
3. What’s the easiest way to create a pattern for your case?
You don’t need a fancy pattern to get started—just a basic shape that fits your sunglasses. Here’s the deal. Lay your glasses flat and measure their length and width. Add 2.5 cm (1 inch) around the edges for seam allowance and ease.
Most simple cases use a rectangle or envelope-style pattern. For beginners, tracing around the sunglasses with added buffer space works just fine. If you prefer precision, use grid paper or printable templates online.
Don’t forget to create two pieces for the outer fabric and two for the lining. If you’re adding padding, cut those pieces too.
To make the opening more functional, round off the top edges of the rectangle. A curved edge makes it easier to slide glasses in and out, plus it looks more polished.
When in doubt, do a paper mock-up and test the fit. It saves time and fabric in the long run.
| Pattern Type | Ideal For | Notes |
|---|---|---|
| Rectangle | Most basic shapes | Easy to cut and sew |
| Envelope | Stylish closures | Requires top flap |
| Rounded Top | Easy access | Softens design visually |
Want a pro tip? Test your pattern using scrap fabric before committing to your final cut.
4. How do you prepare the fabric pieces before sewing?
Once your pattern is ready, prep work becomes your new best friend. So, what’s next? Iron your fabric thoroughly to remove any wrinkles—it ensures accurate cutting and cleaner seams.
Lay your fabric flat and pin the pattern securely. Cut slowly, following the shape carefully. Use sharp scissors for clean edges or a rotary cutter for speed and precision.
Stack the fabric pieces in the correct order: outer fabric right sides together, lining fabric right sides together. If you’re using interfacing or padding, fuse or baste them to the wrong side of your outer fabric.
Mark notches or guides with tailor’s chalk to keep alignment accurate during sewing. Don’t skip this—misalignment leads to uneven seams and a lopsided finish.
Use clips instead of pins if you’re working with leather or vinyl to avoid puncturing the material.
| Task | Purpose | Tools Needed |
|---|---|---|
| Ironing | Flatten wrinkles | Iron, ironing board |
| Cutting | Shape fabric accurately | Scissors, rotary cutter |
| Marking | Guide stitching lines | Tailor’s chalk |
But don’t stop there… Preparation sets the foundation for a smooth sewing process, so take your time here.
5. What are the steps to sew a basic sunglasses case?
Here’s where the fun really begins. Let’s dive in. Start by stitching the outer fabric right sides together along the sides and bottom, leaving the top open. Do the same with the lining pieces—but leave a small gap at the bottom for turning later.
Clip the corners and curves to reduce bulk, then turn both pieces right side out. Slip the lining inside the outer shell so the right sides are facing each other. Align the top edges and sew around the opening.
Next, pull the outer fabric through the hole left in the lining. Push the lining into the outer shell and press the edges flat. Close the gap in the lining with a hidden stitch or topstitch along the bottom.
Topstitch around the case opening for a clean, professional look. This also strengthens the seams.
| Step | Action | Tip |
|---|---|---|
| Stitch outer shell | Side seams, right sides in | Use ¼” seam allowance |
| Insert lining | Align top seams | Pin evenly around edges |
| Turn & finish | Pull inside out, press edges | Topstitch for durability |
And there you have it. A sleek, functional sunglasses case sewn by your own hands.
6. How do you add a soft lining to protect the lenses?
The inside of your case matters just as much as the outside. But here’s something people overlook… your sunglasses’ lenses are vulnerable to scratches, even from minor friction. That’s why the lining you choose plays a big role in overall protection.
Microfiber is the gold standard here. It’s soft, smooth, and naturally dust-resistant. Felt is a decent alternative—thick and easy to work with—but can be a bit rough on delicate coatings. Cotton can be used, but only if paired with a softer interfacing.
To attach the lining, align it with your outer fabric and sew as one, making sure the soft side faces inward. Keep the seam allowances consistent, and don’t skip the pressing step—creased seams cause bunching inside the case, which affects usability.
Double-check for thread tails or uneven stitches. Anything protruding could cause lens abrasion over time. If you’re making multiple cases, consider investing in lint rollers or compressed air to clean each piece before final assembly.
If you want the inside to feel even more high-end, look into velvet or satin blends. These options may require more careful sewing but provide a luxurious finish.
| Lining Material | Protection Level | Ease of Use |
|---|---|---|
| Microfiber | Excellent | Medium (slippery) |
| Felt | Moderate | Easy |
| Velvet/Satin | High-end feel | Requires precision |
The takeaway? A great lining isn’t just about looks—it’s functional and can extend the life of your glasses.
7. What closures work best for homemade cases?
Once the body is done, it’s time to seal the deal—literally. But which closure works best? That depends on your goals. For ease and speed, Velcro is the go-to. It’s simple to apply and offers reliable hold. Just be aware it can wear out over time and may collect lint.
Snaps, whether magnetic or press-in, give a polished finish. They’re ideal for envelope-style cases and create a satisfying closure. Installing them requires a bit of extra effort, especially if you’re using thicker materials, but the result is worth it.
Buttons add a handcrafted charm. You can use a loop or a tab, which also adds flexibility to your design. Zippers provide maximum security and a sleek finish but are trickier to sew and may not suit all fabric types.
Choose based on user experience—do you want easy access or a firm lock? For production, consider closures that can be applied consistently without driving up labor time.
#
| Closure Type | Security Level | Difficulty | Notes |
|---|---|---|---|
| Velcro | Medium | Low | Quick and easy |
| Snaps | High | Medium | Professional look |
| Zipper | Very High | High | Best for hard-shell cases |
Need help choosing? Think about who’ll use the case and how often they’ll open and close it.
8. How can you personalize your sunglasses case?
Here’s where creativity takes center stage. Want to stand out? Personalization makes each case unique. Start with embroidery—it’s timeless and works on almost any fabric. Use initials, logos, or even fun icons like suns or palm trees.
Iron-on patches are another easy upgrade. They’re fast to apply and give an edge, especially on denim or canvas. Custom tags, labels, or monograms add a boutique feel—ideal if you’re selling or gifting the cases.
Decorative stitching like topstitching in contrast thread or edge piping adds subtle but noticeable detail. Even the closure choice can enhance aesthetics—think leather straps or antique buttons.
For kids’ versions, use fabric paint or printed panels with their favorite characters. For corporate gifting, stick with minimal branding and premium textures.
| Customization | Technique | Suitable Materials |
|---|---|---|
| Embroidery | Hand or machine | Cotton, felt, denim |
| Patches | Iron-on or sew | Canvas, denim, leather |
| Labels | Woven or printed | All types |
Here’s the magic… personalization adds not just value, but emotional connection to the product.
9. Can you make a no-sew sunglasses case?
Sewing isn’t the only path. Here’s an alternative you might like. A no-sew case offers speed, simplicity, and accessibility. You’ll need fabric glue, fusible webbing, or heat-activated bonding tape.
Choose felt or foam-backed fabric that won’t fray. Cut your pattern and fold as you would a sewn version. Apply glue to the seams and press together. Let dry under weight for a few hours.
For closure, opt for adhesive Velcro or press-in snaps. A fold-over flap can work without any hardware if the fabric holds shape well.
No-sew doesn’t mean low-quality. With careful alignment and the right materials, these cases hold up surprisingly well.
Great for kids, travel projects, or when you’re short on time.
| Item | Function | Alternatives |
|---|---|---|
| Fabric Glue | Seam bonding | Heat bonding tape |
| Adhesive Velcro | Closure option | Fold-over flap |
| Felt | Non-fraying material | Foam, vinyl |
Think it’s too basic? Not at all. With the right finish, no-sew can look just as polished as sewn ones.
10. What are some eco-friendly or upcycled case ideas?
Sustainability is more than a trend—it’s a mindset. Want to keep waste out of landfills? Start by repurposing old clothes. Denim jeans, canvas tote bags, or flannel shirts make sturdy and stylish sunglasses cases.
Cut out workable fabric sections, avoid stained or overly worn areas, and follow standard cutting and assembling methods. For padding, use leftover fabric scraps or old pillow stuffing.
You can also look for biodegradable materials like hemp, cork fabric, or organic cotton. These may cost more but appeal to conscious users or eco-focused brands.
Don’t forget packaging. If gifting or selling, use recyclable paper or cloth pouches instead of plastic sleeves.
| Upcycled Material | Source | Best Use |
|---|---|---|
| Denim | Old jeans | Durable, stylish casing |
| Canvas | Reused bags | Holds structure well |
| Organic Cotton | Fabric offcuts | Soft, eco-friendly lining |
The bonus? You’re not just saving money—you’re contributing to a greener world.
11. How can kids safely make their own sunglasses cases?
Crafting is a fantastic way to engage kids—but safety must come first. So, what should you keep in mind? Begin by choosing kid-safe materials: felt is ideal. It doesn’t fray, is easy to cut, and can be glued instead of sewn.
Use safety scissors with rounded tips, and supervise cutting at all times. Fabric glue or double-sided fusible tape are great alternatives to needles and thread. If a child is learning to sew, use plastic needles and pre-punched holes on fabric panels for an easier experience.
Make the project fun by involving them in fabric selection. Let them draw their design first, or add stickers, glitter, or iron-on patches.
Keep steps minimal. A simple folded pouch with one glued seam and a Velcro closure is more than enough. The goal is confidence and creativity—not perfection.
Organize materials in trays, and always work in well-lit spaces. If using irons or hot glue for any reason, adults should handle those steps.
| Tip | Why It Matters | Suggested Tools |
|---|---|---|
| Pre-cut fabric shapes | Reduces error and frustration | Scissors, templates |
| Fabric glue over sewing | Avoids needle hazards | Non-toxic fabric glue |
| Kid-designed patterns | Boosts ownership and fun | Crayons, washable markers |
Here’s something fun… turn the finished product into a show-and-tell piece—they’ll be proud to explain how they made it!
12. What are the most common mistakes to avoid?
Even simple projects can go sideways. Let’s talk about what not to do. The most frequent mistake is inaccurate measuring. This leads to cases that are too tight or too loose. Always measure your sunglasses and add enough seam allowance—at least 1 cm all around.
Another issue? Choosing slippery or stretchy fabric. These are harder to sew and often shift during assembly. Stick with stable fabrics unless you’re confident with handling more complex materials.
Skipping interfacing or padding may save time, but it compromises protection. If the case feels flimsy, it probably won’t do its job.
Many beginners also rush the topstitching. Uneven stitching looks unprofessional and can affect function. Use guide marks and sew slowly for consistency.
Lastly, improper alignment of closure elements—like misaligned Velcro or a crooked snap—can ruin the finish and usability.
| Mistake | Consequence | How to Fix |
|---|---|---|
| Poor measurements | Glasses don’t fit | Always double-check sizes |
| Rushing stitching | Crooked seams, weak structure | Sew slowly and use guides |
| Wrong fabric choice | Hard to work with or tears easily | Stick to beginner fabrics |
The bottom line? Slow down, double-check each step, and don’t be afraid to redo small parts to get it right.
13. How can you maintain and clean your handmade case?
Maintenance is often overlooked—but essential. Want your case to last longer? Start by choosing washable fabrics if you know it’ll see heavy use. Cotton, canvas, and some microfibers can be spot-cleaned or machine washed (on gentle).
Always read labels or do a test wash on scrap fabric. Leather or vinyl cases should be wiped with a damp cloth and mild soap. Never submerge them in water.
Avoid overstuffing the case. It might stretch the fabric or stress the seams. And don’t store it in overly humid places—that can lead to mildew, especially if the case is rarely used.
If your case becomes misshaped after washing, stuff it with a clean towel and press it lightly to return to form. Ironing helps on most fabrics, but not synthetics.
Store it in a drawer or pouch when not in use, and avoid tossing it in bags with sharp objects like keys.
| Cleaning Method | Works On | Tips |
|---|---|---|
| Machine wash (gentle) | Cotton, canvas | Use mesh bag and cold water |
| Spot clean | Microfiber, denim | Mild soap and soft cloth |
| Wipe clean | Faux leather, vinyl | Avoid alcohol-based cleaners |
Here’s the trick… treat it like any other accessory—regular cleaning keeps it looking and working like new.
14. Can you make cases in bulk for sale or gifting?
Thinking bigger? You’re not alone. Many crafters turn this simple project into a small business or gifting idea. Making in bulk requires streamlining your process. Start with batch cutting—lay multiple fabric layers together and cut identical pieces.
Use the same pattern for all cases to speed things up. Pre-iron all fabric and group similar steps—like stitching all linings before moving on to outer shells.
When gifting, think about packaging. Kraft boxes, cloth pouches, or recycled paper bands add a finishing touch. Include care instructions for an extra layer of thoughtfulness.
Selling? Focus on presentation and consistency. Quality photos, neat seams, and branded tags go a long way. Platforms like Etsy or local craft fairs are ideal for this scale.
If demand grows, you might even consider outsourcing parts of the process—like embroidery or packaging—to local partners.
| Tip for Scaling Up | Benefit | Tools/Resources |
|---|---|---|
| Batch process steps | Saves time and energy | Assembly lines, cutting guides |
| Use templates | Ensures consistency | Acrylic or cardboard templates |
| Invest in packaging | Boosts perceived value | Custom tags, eco wrap |
And here’s something inspiring… even a simple handmade item can build into a thoughtful product line with smart planning.
15. What are some stylish variations you can try?
Once you’ve mastered the basics, it’s time to experiment. Why stick to just one design? A roll-up case with elastic slots can hold multiple glasses or accessories. These are especially handy for travel or display.
Another option: hard-shell cases using interfacing or cardboard inserts. They require more effort but offer excellent protection. Use outer fabric to wrap the shell and stitch or glue together.
Envelope-style cases with flap closures offer a sleeker silhouette. Pair them with a snap button or even a magnet for a modern finish.
You can also explore hybrid designs—like padded pouches with leather flaps or cases with attached keychain loops. Add D-rings or carabiners for portability.
Check Pinterest, Instagram, or marketplaces for fresh ideas. Keep a sketchbook of what catches your eye and tweak to fit your material and skill level.
| Design Style | Features | Best Use |
|---|---|---|
| Roll-up | Holds multiple items | Travel or family use |
| Envelope | Flap closure, slim look | Everyday carry |
| Hard-shell | Durable structure | High-end sunglasses |
Let your imagination run free… the case you make reflects your creativity just as much as your craftsmanship.
Conclusion
You’ve now explored every step, variation, and creative angle for making a sunglasses case. Whether you’re sewing your first pouch or launching a small line of accessories, this guide provides the structure, insight, and inspiration to do it right. So grab your scissors, prep your fabric, and enjoy turning a simple idea into something functional, beautiful, and uniquely yours.
FAQ
- Q1: What is a sunglasses case?
A sunglasses case is a protective pouch or shell used to store eyewear and prevent damage like scratches, bending, or lens wear. - Q2: How does a fabric sunglasses case protect eyewear?
It provides a soft, cushioned barrier that shields lenses from friction, dust, and impact while stored or carried. - Q3: Can I make a sunglasses case without a sewing machine?
Yes, a no-sew version can be made using felt, fabric glue, and adhesive Velcro for quick and safe assembly. - Q4: What fabric is best for a soft sunglasses case?
Felt, cotton, microfiber, and even denim all work well, depending on your preferred balance of softness and durability. - Q5: How long does it take to make one sunglasses case?
Most simple cases take 30 to 45 minutes. More detailed or personalized designs may take longer depending on the technique used.